First Run Setup
Initial configuration and onboarding for DMARC Reports Enabler
Setup Wizard
When opening the DMARC Reports Enabler app for the first time, all new users will see a dialog requesting permission to use the necessary connections.
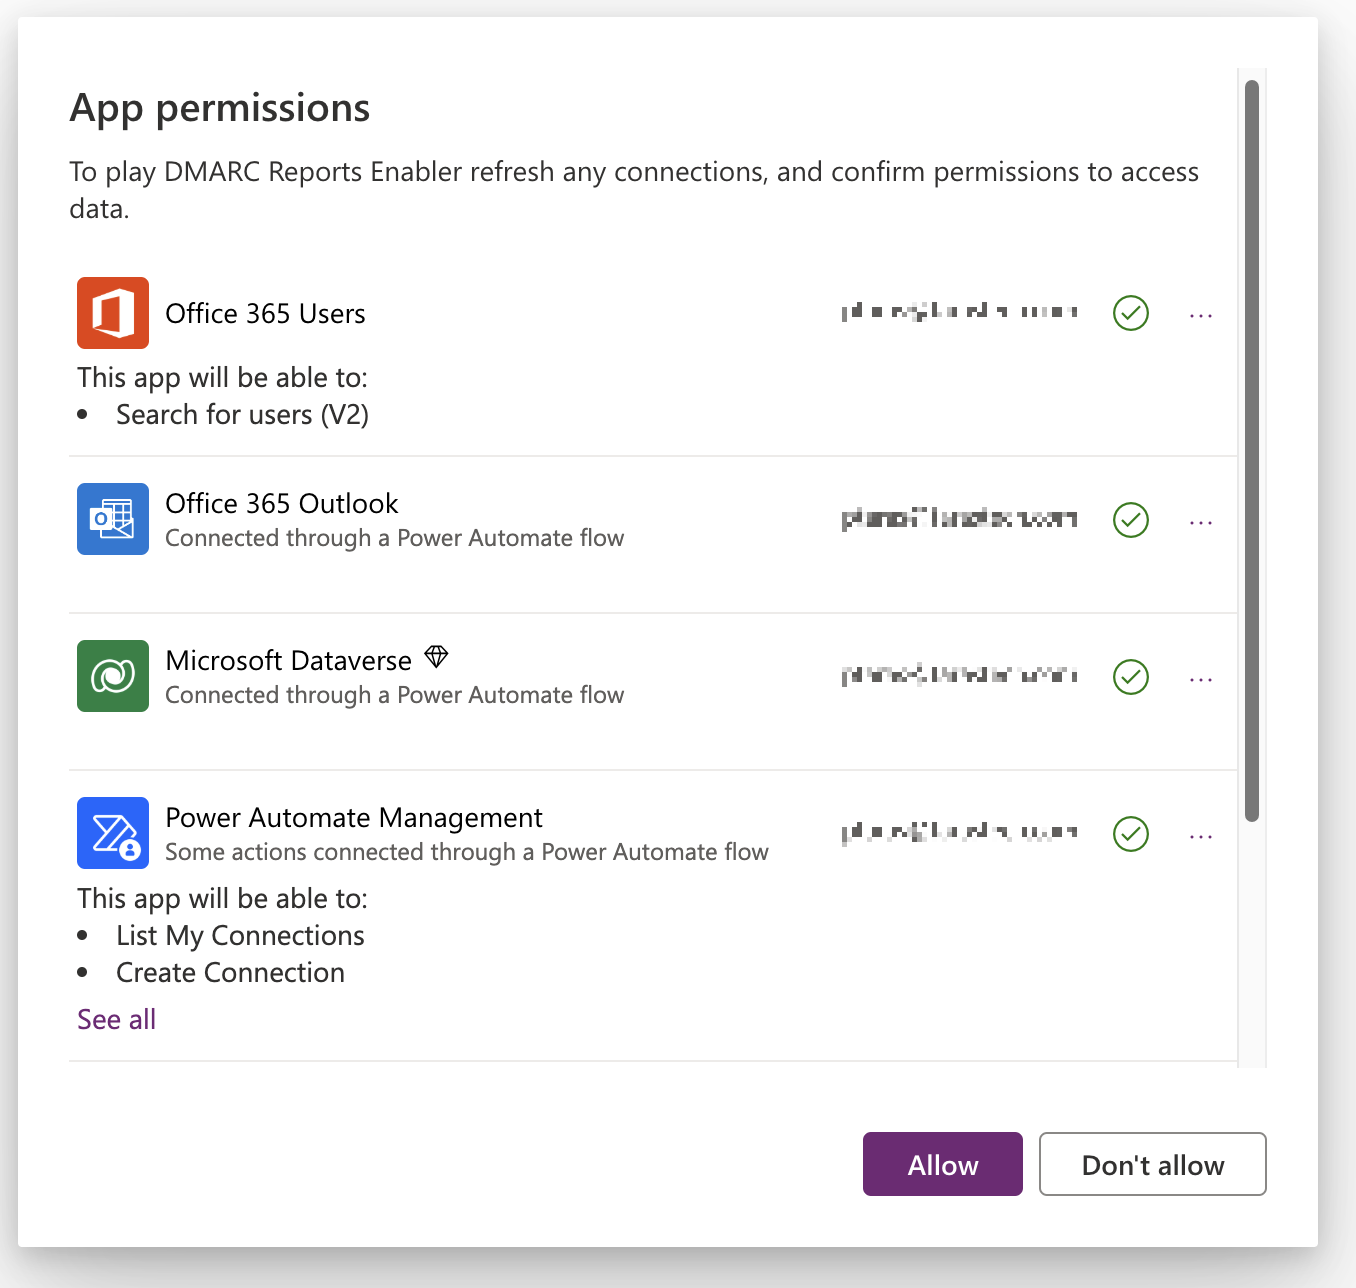
If you see an error message instead, this may be due to a Data Loss Prevention (DLP) policy issue or a missing license. Refer to the Troubleshooting section for guidance.
For organizations with many users accessing the app, this behavior can be disabled by granting admin consent via PowerShell. See the How-to section for more information.
This is the start screen when the app is opened for the first time:
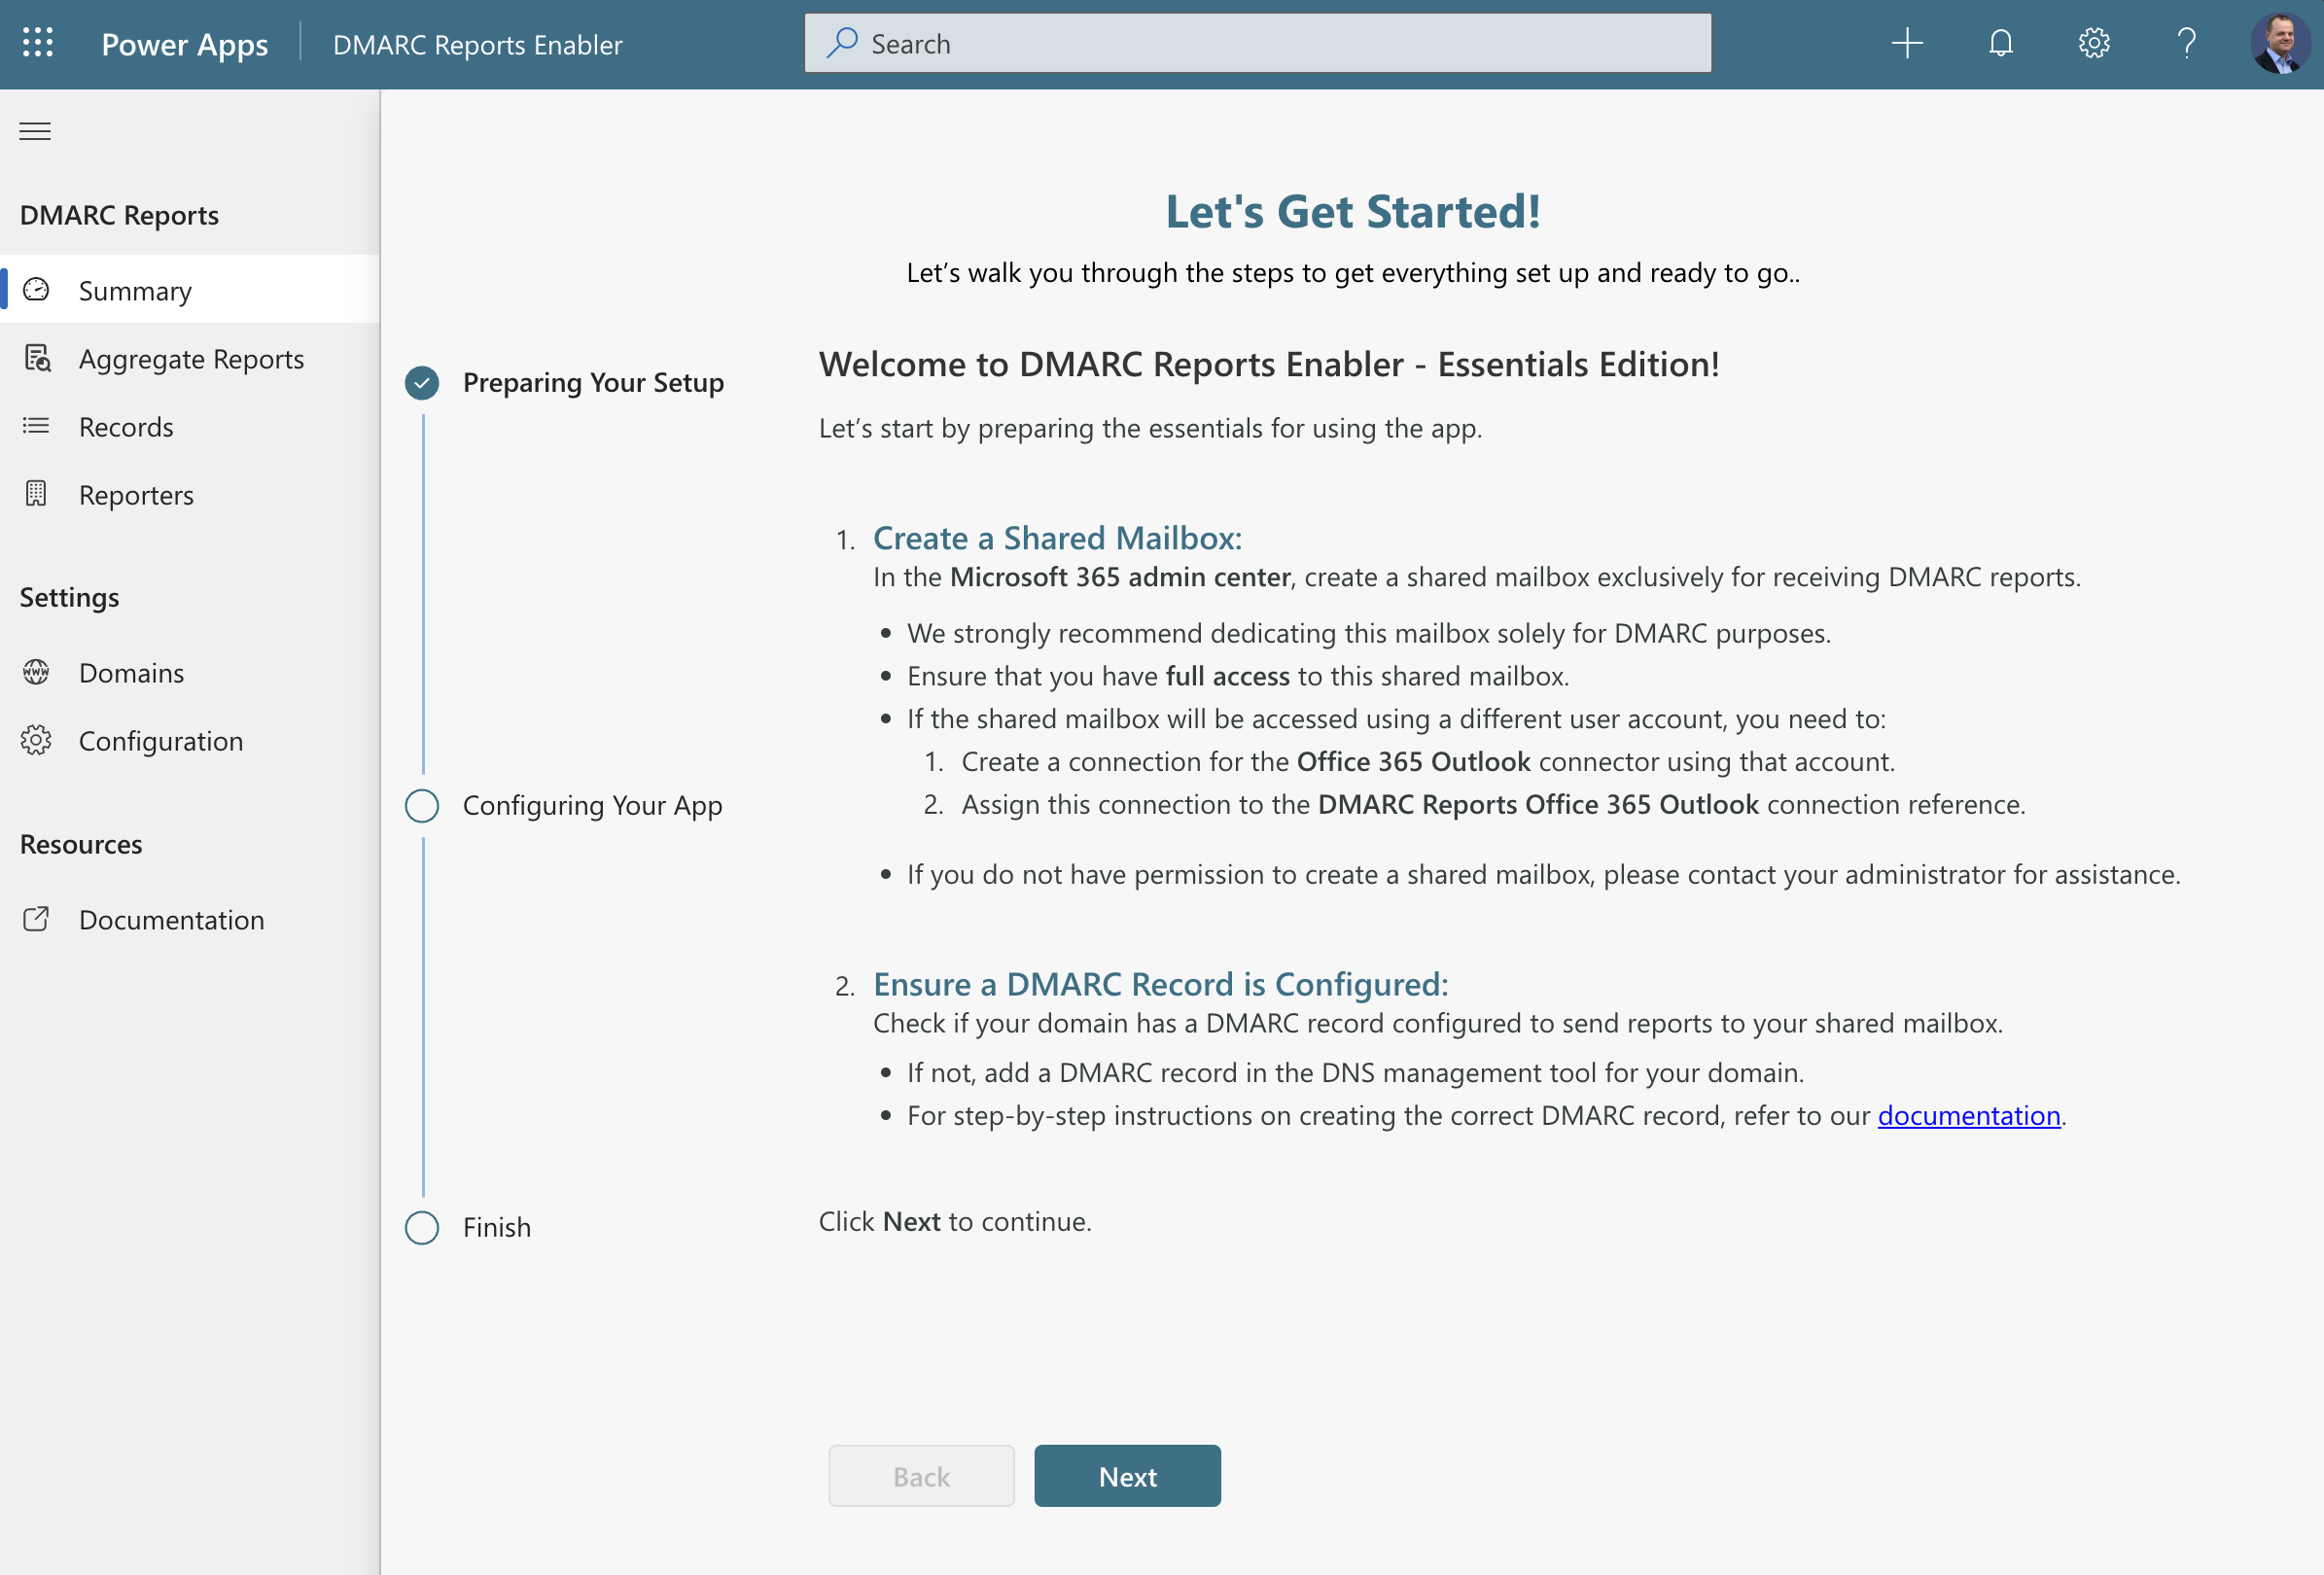
Step 1: Create a Shared Mailbox
- Go to the Microsoft 365 Admin Center and create a shared mailbox exclusively for receiving DMARC reports. If you lack permission to create a shared mailbox, contact your administrator.
We recommend that this mailbox is solely dedicated for DMARC purposes.
- Ensure you have full access to this shared mailbox.
If the app should access the mailbox through a different user account, do the following:
- Go to the Connections page of the Power Apps portal.
- Create a new connection for the 'Office 365 Outlook' connector using the designated account.
- Assign this connection to the DMARC Reports Office 365 Outlook connection reference by selecting it from the Default Solution in your environment.
If you gain access to the shared mailbox after opening the app for the first time, recreate the connection for the Office 365 Outlook connector. Failing to do so will result in “Access Denied” errors for importing flows, even if you now have mailbox access.
Step 2: Ensure a DMARC Record is Configured
- Verify that your domain has a DMARC record configured to send reports to your shared mailbox. If no record is configured, add one using your domainʼs DNS management tool.
- Example:
_dmarc.example.com. IN TXT "v=DMARC1; p=quarantine; rua=mailto:dmarc@example.com"- For detailed guidance on creating a DMARC record, refer to our documentation.
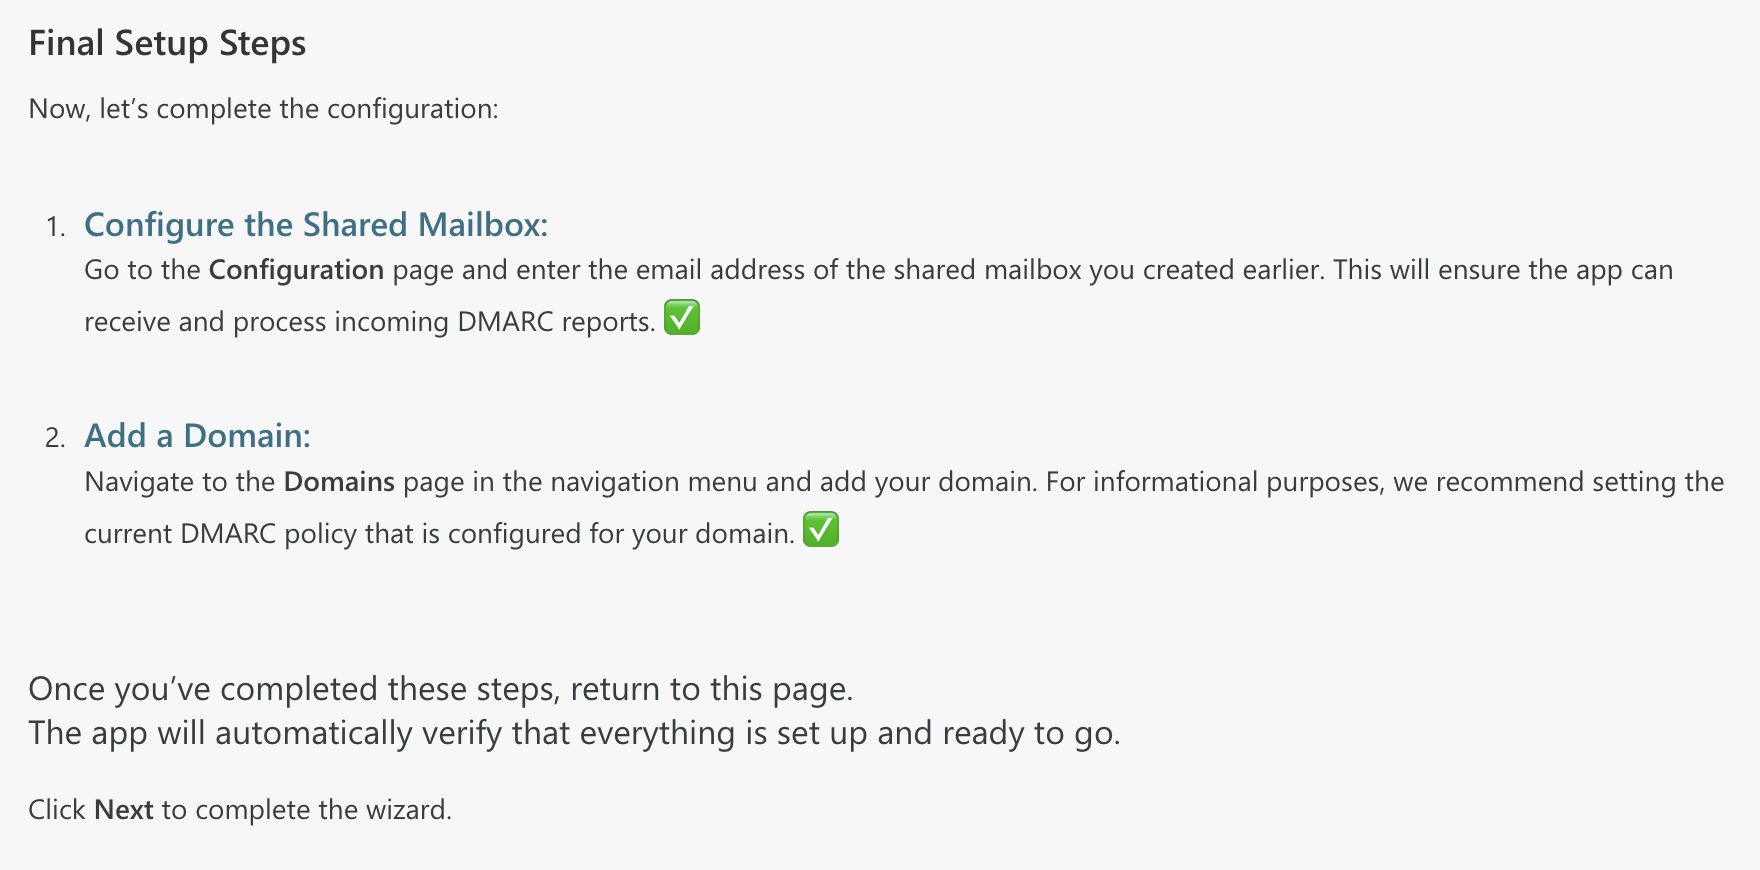
Step 3: Configure the Shared Mailbox
-
Navigate to the Configuration page in the app.
-
Enter the email address of the shared mailbox created in Step 1. This ensures the app can receive and process incoming DMARC reports.

-
Once completed, proceed to the Domains section.
Step 4: Add a Domain
- Go to the Domains page in the appʼs navigation menu.
- Add the domain you want to monitor. For informational purposes, set the current DMARC policy configured for your domain.
Please note: with the Basic Edition you can add only one domain. To monitor multiple domains, consider upgrading to the Premium edition.
- Once completed, return to the Dashboard page. Ensure the last two steps show green checkmarks.
- Click Next to enable all solution workflows.
Step 5: Enable Workflows
For the solution to function properly, all workflows (flows) must be activated. The following flows are deactivated by default after installation:
- DMARC Reports | All Connectors
- DMARC Reports | Create Report
- DMARC Reports | Notify
- DMARC Reports | Notify On New Report
- DMARC Reports | Notify Once A Day
- DMARC Reports | Process Incoming Report
- DMARC Reports | Process Past Reports
- Go to the Cloud Flows section within the DMARC Reports Enabler Essentials solution in Power Platform.
- Activate all flows that are currently turned off.
- Return to the app. It will automatically verify the activation status of the flows to confirm readiness.
- Click Next, then select Close Setup.
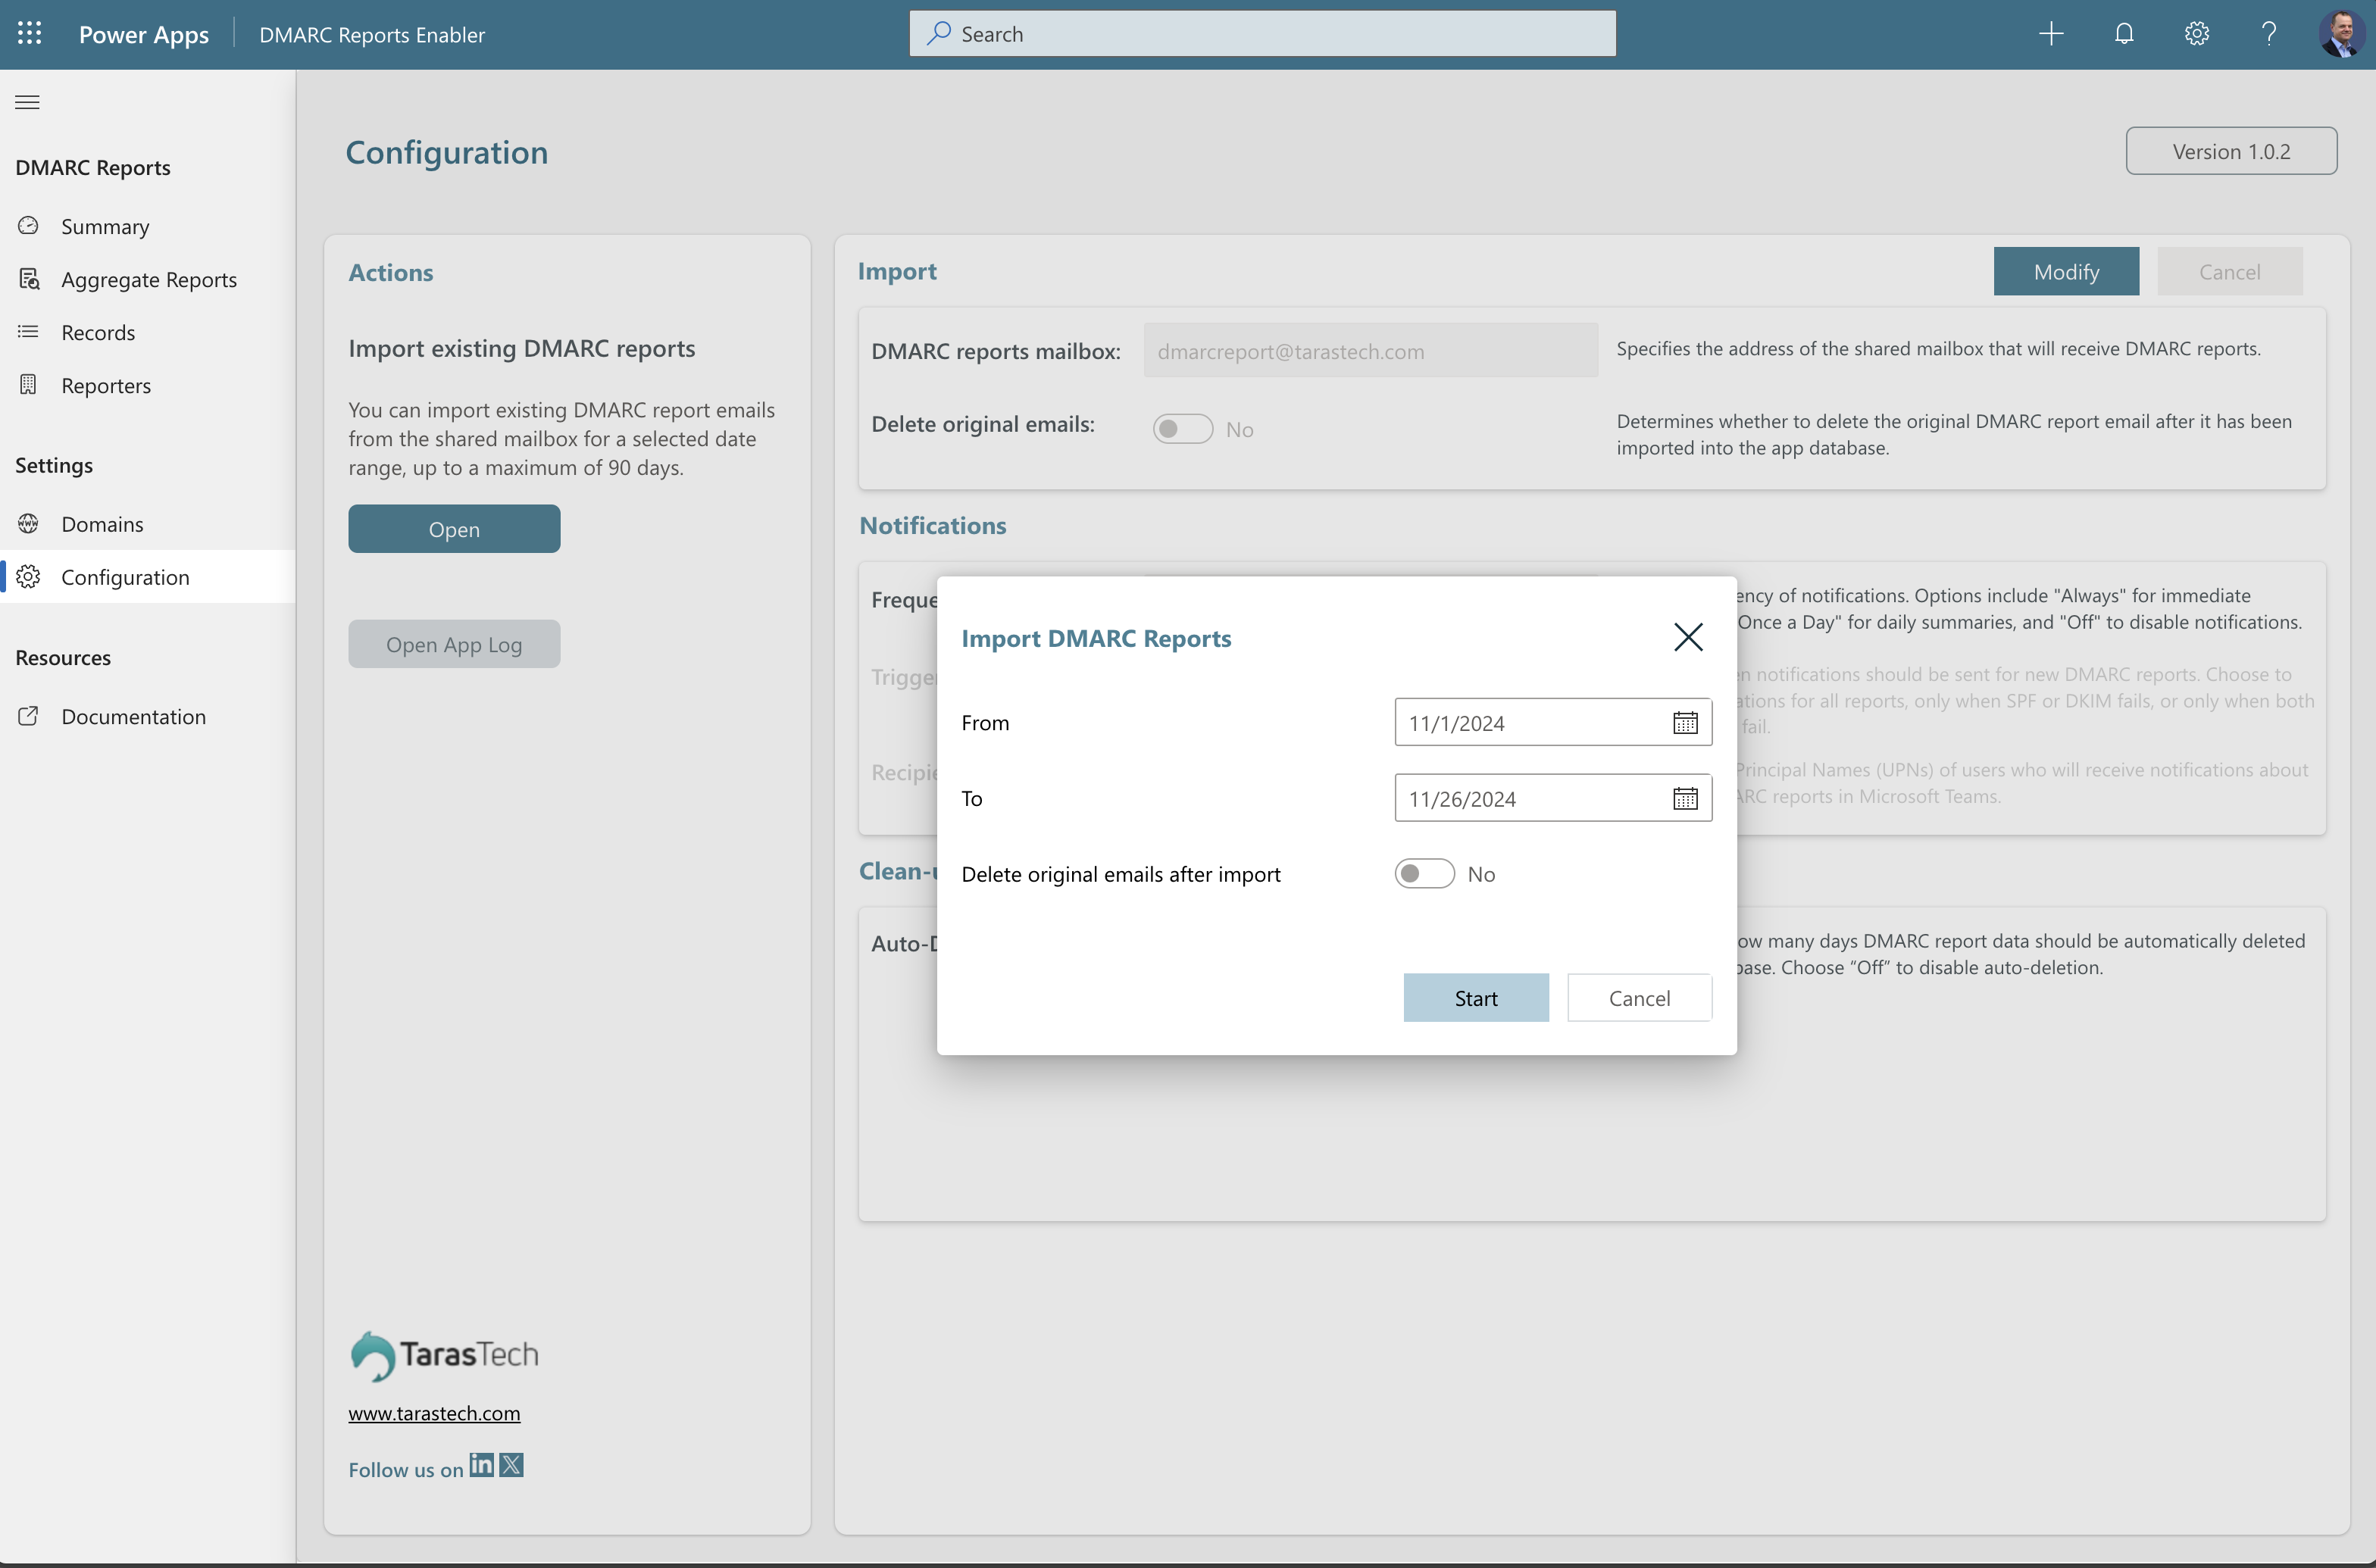
Step 6: Import Existing DMARC Reports (Optional)
If you have existing DMARC report emails in the shared mailbox, you can import them via the Configuration page.